We’ve all made cake pops – good grief – what a bore!
For starters, who really wants a mouthful of dry cake, mixed with sickly sweet buttercream? Then there’s the fact that they take soooo long to make, fall off if you make them too big, or include too much buttercream… No, no. The cakepop is dead.
So, what’s the alternative? Clearly you’re reading my MallowPop post, so the answer must be a MallowPop – yay!
For starters:
- the basic varieties are much easier to make
- they actually last for much longer than cake pops, which means you can make them much further in advance – a real boon for those of us baking for cake sales, parties etc
- anything you can do to a cakepop, you can do to a mallowpop
- mallowpops can be made gluten-free – a huge boon if you’re creating for the masses
- they also allow you a huge amount of scope in terms of decoration, flavouring etc.
- you can make your own marshmallows if you really want to up the flavourings and complexity
I would almost go on to say that they offer the same customisation scope as macaron – and potentially far more flavour impact variations than cake…
But let’s not get ahead of ourselves – let’s start with the basic idea. Anyone can take a packet of marshmallows, and cover them in chocolate – even using candy melts if you have to… At this level it’s a great thing for kids to get involved with too, and nowhere nearly as traumatic as cake pops.
So lets begin….
Of course I may have lied a little, when I said I’d press on with the basic MallowPop. But if you know me, you’d know that I have a mini-aversion to rubbish ingredients… If you’re going to make a decent MallowPop, I think it’s worth spending a little more time and money on decent ingredients. I promise I will however post shortly using candy-melts, or something of that ilk.
Let’s start with a few basic couveture chocolate rules:
- chocolate (generally) hates water – if you’re going to use a bain-marie to melt your chocolate, make sure you never drop any water into the melted chocolate – it will seize the mixture
- all pre-tempered chocolate (which is generally what you’d be buying, already has tempered crystals in it. We’re not going to talk extensively about that now, just bear that in mind
- if you melt tempered chocolate to it’s given range (which is usually printed on the packet!), you will not take the chocolate out of temper (that is, remove the crystals)
- even if you do take the chocolate out of temper, just add a bit more of the tempered chocolate back into it, and that will reseed the chocolate
- calm down, none of this is as complicated as it sounds
- very generally speaking, if you keep the temperature of the chocolate between 26ºC and about 38ºC, you will not have any problems
- if you’re going to melt your chocolate in a microwave (which I do), make sure you only do it in 15 second busts, and check the temperature towards the end
- always microwave your chocolate in a plastic, not glass bowl, and use a plastic spoon when mixing
- an infrared / laser thermometer is an absolute god-send for checking the temperature of chocolate, as you don’t have to put it into the chocolate
- always use fresh marshmallows – even marshmallows which have been out for 12 hours in an airtight box are too old – the chocolate will peel away, and the mallowpop is too dry
- by far the best thing to set chocolate onto is food-grade acetate, which is inexpensive to buy
- if you’re lucky enough to have Neff warming drawer ( I adore mine), you can keep several bowls of chocolate in temper while you’re working by keep them at the 1.5 setting – check the temperature again before you begin, and if over 38ºC, you can reseed them with a handful of fresh chocolate
- I’ve found I can actually keep chocolate in temper overnight in the warming drawer, though it’s probably best to take it down the the 1 setting
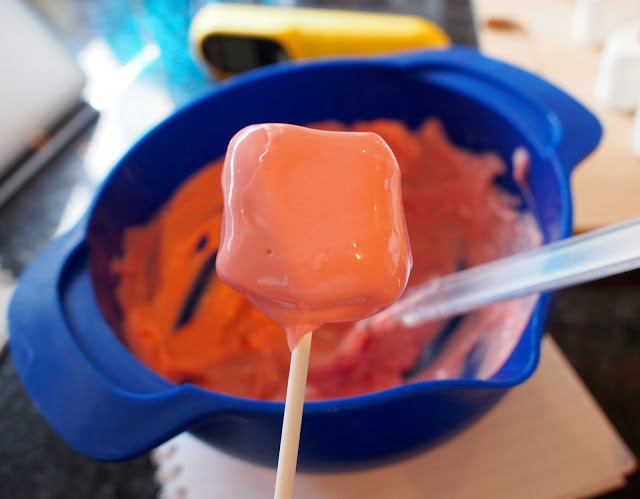
- As a basic method, take a freshly opened pack of marshmallows (or make your own, more on that later), and taking a 15cm cake pop stick, dip the stick into the melted chocolate, and plunge into your marshmallow
- I found it easier to put all the marshmallows vertically onto a chopping board, and then plunge the stick in on that
- Wait for a few minutes until the chocolate has set-up a little, and then swirl the marshmallow into a bowl of tempered chocolate.
- Put the MallowPop either onto acetate to set, or using an old piece of polystyrene, allow the chocolate to set there… If the chocolate is still in temper, it should set within a couple of minutes

Chocolate Suppliers:


